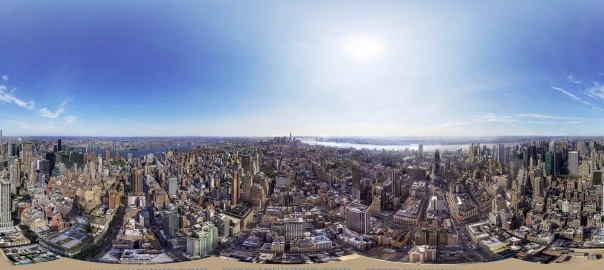
Ultra high resolution (301megapixel) panorama of night Manhattan as it seen from Top of the ROC.
Canon 5ds r +50mm f/1.8. 3 bracket HDR.
Click on an image below to see interactive full resolution version:


Made in cooperation with round.me
In search for which camera to choose for gigapixels: Crop with less gigapixels? or Full Frame with more gigapixels? I made a simple comparison table where pixels per degree are calculated:
| crop factor | angle in degrees | |
| 300mm 1.5x (APC Nikon) | 1.5 | 3.1 |
| 300mm 1.6x (APC Canon) | 1.6 | 2.9 |
| 300mm 1x (FF) | 1 | 4.6 |
Assume, we have 300mm lens and portrait orientation of camera:
| Camera | Megapixels | image width in pixels | crop | angle in degrees | pixels in 1 degree | Number of images required to cover 360 (with 0 overlap) | Equatorial 360 panorama’s width in pixels |
| Nikon D7200 | 24 | 4000 | 1.5 | 3.1 | 1290 | 116 | 464516 |
| Canon 750d | 24 | 4000 | 1.6 | 2.9 | 1379 | 124 | 496552 |
| Canon 7d mkII | 24 | 3648 | 1.6 | 2.9 | 1258 | 124 | 452855 |
| Canon 5d mkIII | 22 | 3840 | 1 | 4.6 | 835 | 78 | 300522 |
| Nikon d810 | 36 | 4912 | 1 | 4.6 | 1068 | 78 | 384417 |
| Canon 5ds r | 50 | 5792 | 1 | 4.6 | 1259 | 78 | 453287 |
These number doesn’t take into account diffraction which can be a practical issue.
Sony APS-C cameras with 24Mpix should be treated similar to Nikon D7200.
More pixels in degree – better. FF is better than APC-S (requires less images). So for me the winner is Canon 5ds r – it allows to achieve almost the same pixel density as other cameras but you can get the same gigapixel with less images – which will mean less overlaps, less space on a card and computer required, faster shooting/stitching..
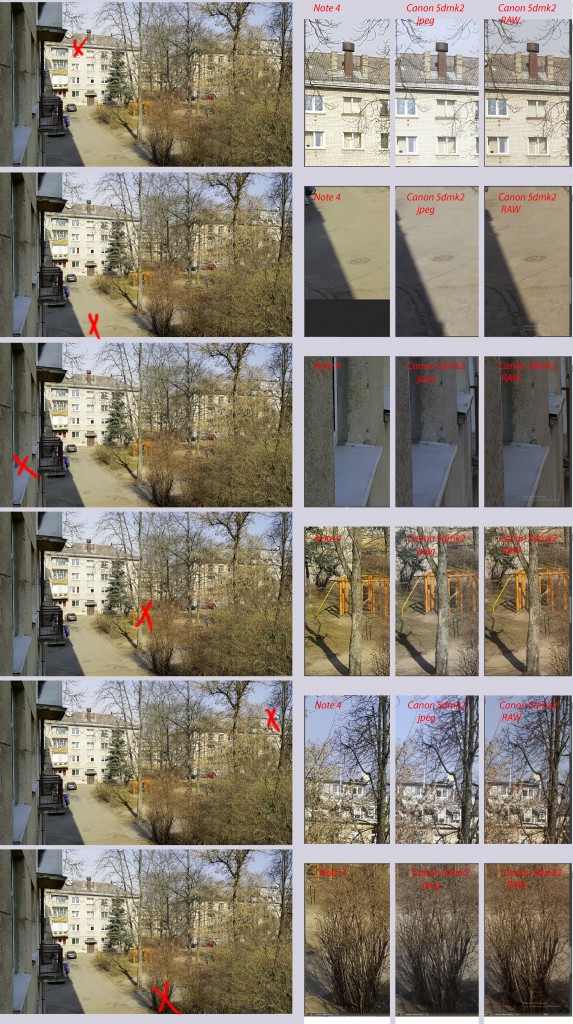
Just made an experiment how my new Galaxy Note 4 stands against my DSLR Canon 5d mark II.
I zoomed 5d mark II with 16-35 f/2.8 II L equal to Note 4 horizontal FOV (what resulted in 29mm) then made several shots from the same point. 5dmk2 JPG+RAW (as I always shot). JPG: WB – auto, Picture style – standard, quality – normal, Aperture priority f/8, evaluate metering.
RAW: some standard tuning to my taste, shadows /highlights – additional sharpness CA removal.
Note 4 camera: h16lsha00sm (according to *#34971539#)
Here is the final result picture (all the images zoomed to actual pixels):

Have to admit what Note 4 is very close or even better to 5dmk2 in Jpeg (what is not surprising as DSLR normally don’t add too much contrast/saturation/sharpness to JPEG engine), And 5d mk2 in RAW is all way better than Note 4 (thanks god :))
professionalpanorama.com meet airpano.com and aerialphotoimage.com during dinner during IVRPA 2014:)
[CP_CALCULATED_FIELDS id=”6″]
Resolution: 14000×7000
Camera/lens: Canon 5d mark II und 8-15 f/4L at 15mm.
Software: PTGUI 10.0.10 Pro, Photoshop CC 2014
Computer: Intel I7 4.1Ghz und 24GB of RAM
As people request some info about panorama: It was shoot with Canon 5d mark II und 8-15 f/4L at 15mm. Stitched from 103 photos (33*3 bracketing + 4 separate photos of fountain . ISO 100, f/11 (2.5s, 0.6s, 1/6s) bracketing (without tripod:).
Initially I ‘ve made easy version – tonemapped all 33 sets with SNS – then stitched pano from that TIFFs. It took 2 evenings But wasn’t pleased with result – looks too “poisoned” to me. BTW: here is it: http://professionalpanorama.com/2014.05.29_las_vegas_paris_eiffel_panorama_hdr/
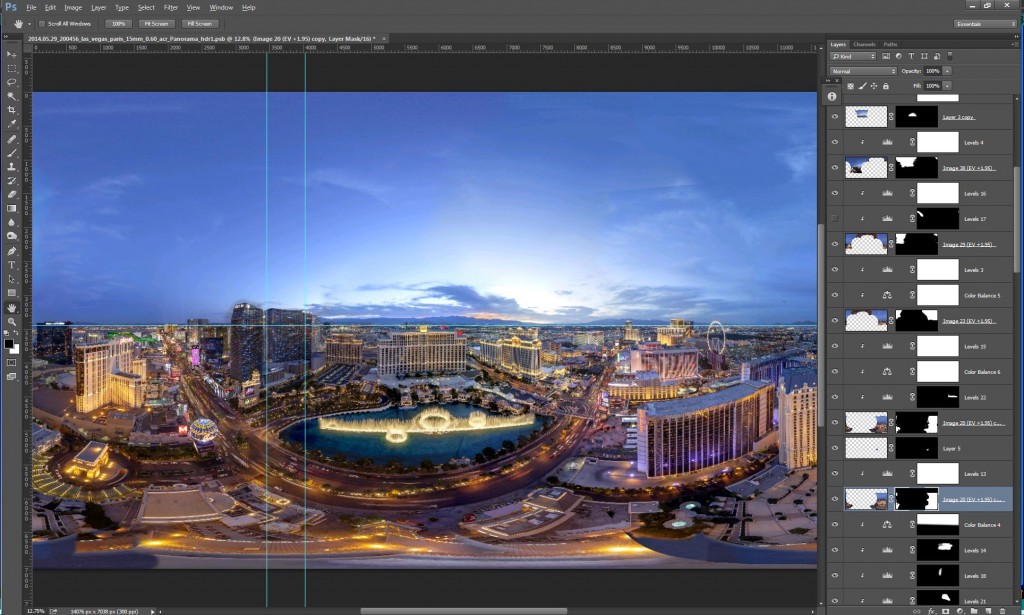
When I tried process which is my favored: PTGUI exposure fusion with layers and started to work with generated PSB file. The PSB has exposure blended layer and all the layers with black masks on top of it. As it is shoot from different points – many parallax errors were present – to fix them I normally finding layer with required part of image and required exposure (as it is bracketing) and reveal required part of it by painting white on a mask. If you shoot from tripod with panohead – then all layers are alligned – and revealed part is exactly aligned to the blended panorama, but in case of the building, you shot from different points – and parallax errors occurs. To fight with them i normally copy part of required layer on top of everything – and transform/allign/warp, As it was shoot during 18min – lights changes at dusk time dramatically – I had to apply adjustments on each copied layer (levels, color balance). Some layers have 5-6 clipped adjustment layers. At the end the result was what whole image was copypasted with adjustments so I deleted ptgui exposure blended part – the image was without holes – which mean I had manually created whole pano 🙂
The whole process took about 3 weeks (several evenings/nights per week)
Screenshoot of photoshop (somewhere in half “job done”)

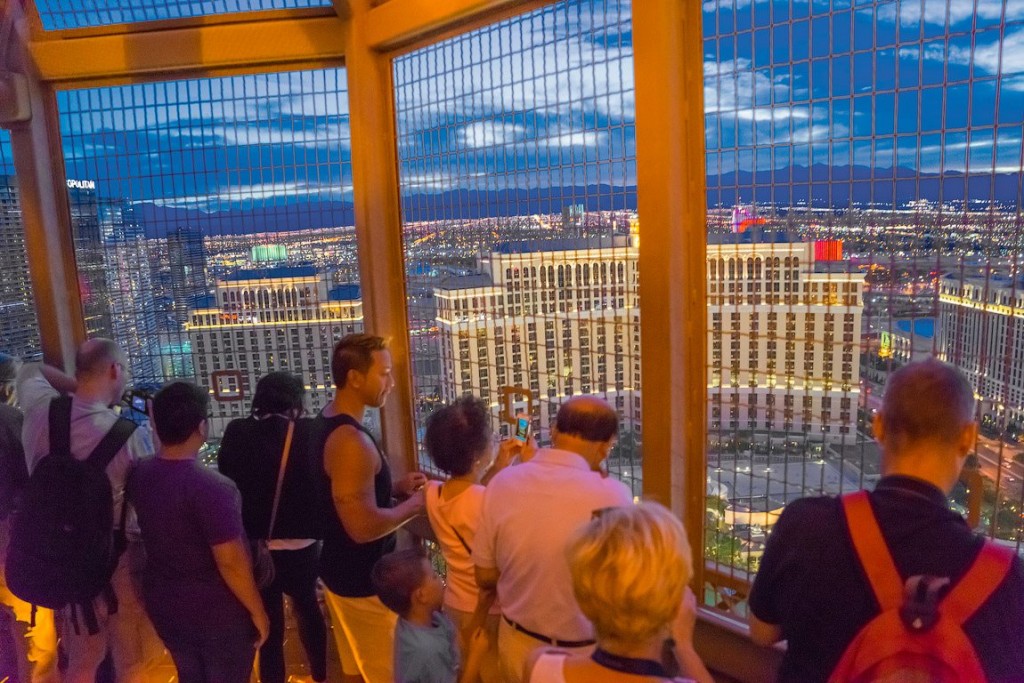
Me (with a black backpack) during the shooting (thanks for photo to Sergey Semenov (airpano.com))
